Disclaimer: This content is for informational purposes only and does not replace professional medical advice, diagnosis, or treatment. Always consult a qualified healthcare provider before beginning any new exercise program.
You’re about to transform ordinary backpacks into powerful training tools without breaking the bank. Sandbag workouts offer dynamic resistance that challenges your muscles differently from traditional weights. But creating your own isn’t just about stuffing a bag with sand—it’s a strategic process requiring careful material selection and construction. If you’ve ever wanted an affordable, versatile fitness solution that leverages everyday items, this guide will reveal how simple yet effective homemade sandbags can revolutionize your training approach.
Key Takeaways
- Repurpose old backpacks with 20-30 liter capacity as durable bases for homemade sandbags by checking for reinforced stitching and strong zippers.
- Use contractor garbage bags as secure inner liners to prevent material leakage when filling backpacks with weight materials like wood stove pellets or gravel.
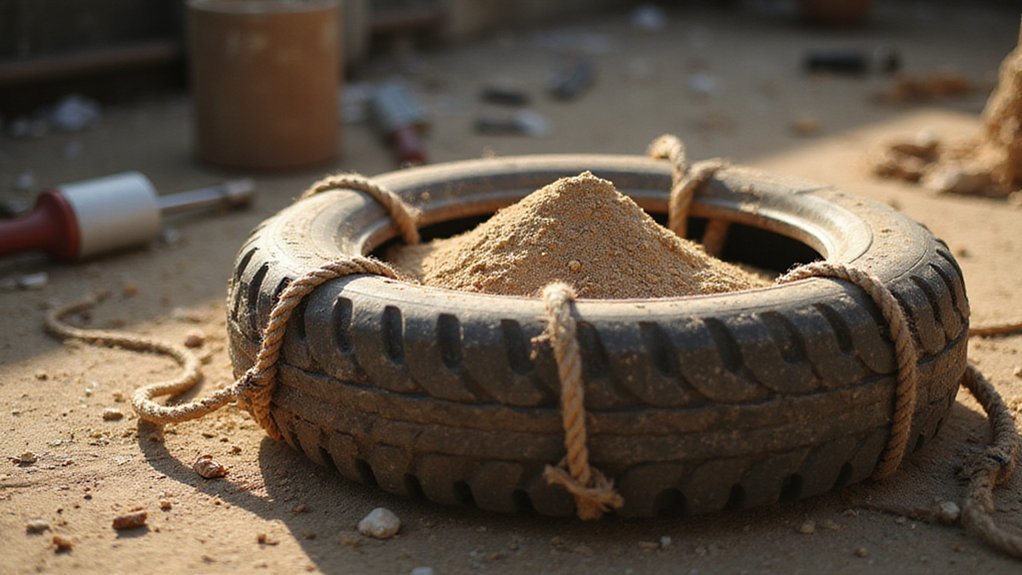
- Create affordable fillers from free or low-cost materials such as landscaping rocks, recycled tire pieces, or locally sourced coarse sand.
- Ensure weight distribution and stability by double-bagging internal materials and using zip ties to secure filler bags inside the backpack.
- Maintain safety by regularly inspecting sandbags for wear, sealing potential leak points with duct tape, and replacing damaged bags promptly.
Essential Materials for DIY Sandbags

When assembling DIY sandbags for fitness or training purposes, selecting the right materials is essential for durability and performance. Start by gathering heavy-duty used bags like old backpacks or duffel bags that can withstand repeated stress. These bags should be structurally sound without visible tears or weak points. Select contractor garbage bags as inner liners to contain your chosen filler material—wood stove pellets, pea gravel, or sand—preventing potential leakage. Zip ties become vital for securing both inner and outer bags, ensuring contents remain compact during intense workouts. Your bag’s weight range should target between 8KG to 45KG, which allows flexibility in training intensity. By carefully choosing robust materials and implementing strategic containment techniques, you’ll create a reliable, customizable sandbag that meets your specific fitness requirements.
Choosing the Right Backpack

Three key considerations define the ideal backpack for DIY sandbag construction: durability, capacity, and structural integrity. Select a backpack crafted from durable materials capable of supporting heavy sandbag weight without compromising performance. Target models offering 20-30 liter capacity to accommodate sufficient filler volume.
Prioritize backpacks featuring reinforced stitching at critical stress points, particularly around seams and attachment areas. Strong zippers and robust construction prevent premature material failure during filling and deployment. Multiple compartments enhance weight distribution and provide strategic storage options for your sandbag materials.
Water-resistant properties offer additional protection, shielding internal contents from moisture and environmental degradation. By systematically evaluating these technical specifications, you’ll transform an ordinary backpack into a reliable, functional DIY sandbag solution that meets rigorous performance standards.
Selecting the Perfect Filling

After carefully selecting a robust backpack capable of withstanding heavy loads, your focus shifts to identifying ideal filling materials that will transform your DIY sandbag into an effective training tool. Wood stove pellets emerge as a superior filling option, offering stability and minimal leakage compared to traditional sand. If pellets aren’t available, consider recycled tire pieces or landscaping materials to provide necessary weight and density. When filling your sandbag, strategically combine heavier materials like gravel or rocks to optimize weight distribution and training challenge. Aim for a standard training weight between 25-30KG, which allows flexibility in intensity levels. Critically avoid fine sand, as it tends to leak through bag seams and create messy complications during use. Your chosen filling will directly impact the sandbag’s performance and durability.
Step-by-Step Assembly Process

Transforming an old backpack into a functional sandbag requires a methodical approach to guarantee durability and performance. When you make your DIY sandbag, start by creating interior filler bags using contractor garbage bags. Fill these bags with your chosen weight material like sand, ensuring each bag is securely packed and manageable.
Double wrap the filled bags with another contractor garbage bag layer to prevent potential leakage and enhance durability. Carefully insert the wrapped sand bags into the backpack, positioning them to fit snugly. Secure the top using zip ties or the backpack’s existing closure system for maximum stability.
Mark each bag’s weight using a fabric pen for easy identification during training, and remember you can adjust weights by adding or removing filler as needed.
Safety and Durability Tips

While creating DIY sandbags demands careful attention, safety and durability are paramount for effective training equipment. Choose heavy-duty backpacks capable of withstanding intense workout loads, and reinforce critical stress points with duct tape or zip ties. Double-bagging using contractor garbage bags provides an additional layer of protection against material leakage.
| Safety Consideration | Recommended Action |
|---|---|
| Bag Integrity | Inspect regularly for wear |
| Seam Security | Seal with duct tape/zip ties |
| Material Resistance | Use moisture-resistant liners |
| Weight Distribution | Balance filler materials evenly |
| Replacement Frequency | Replace bags showing damage |
Moisture-resistant liners prevent material degradation, ensuring consistent performance. Always replace bags showing signs of structural compromise to prevent potential injuries during training sessions. Your commitment to equipment maintenance directly impacts workout safety and effectiveness.
Workout Techniques With Homemade Sandbags
Because sandbag training offers a dynamic approach to strength conditioning, mastering proper workout techniques can greatly enhance your fitness regimen. Your homemade sandbag can be used to make diverse exercise variations, including compound movements like squats, lunges, and deadlifts that build functional strength. Incorporate sandbag carries to challenge your grip and engage core muscles simultaneously. For high-intensity interval training, combine explosive movements such as thrusters and push presses to elevate cardiovascular endurance. Sandbag slams provide a full-body workout targeting upper body power and generating explosive energy. By strategically adjusting the sandbag’s weight through filler modifications, you’ll enable progressive overload—a critical mechanism for continuous strength development and muscle growth. These versatile sandbag workout ideas transform simple materials into an effective training tool.
Maintenance and Care
Since proper maintenance extends the lifespan of your DIY sandbag, you’ll want to develop a systematic approach to care and preservation. Your maintenance routine should focus on keeping the bag in peak condition through regular inspections and strategic care.
Key maintenance practices include:
- Check the outer bag frequently for signs of wear, such as fraying seams or holes
- Clean the exterior with a damp cloth, avoiding harsh chemicals
- Store the used sandbag in a dry location to prevent moisture and mold
- Keep the bag closed when not in use to minimize external contamination
Periodically replace inner liner bags and filler material like wood stove pellets to maintain consistent weight and performance. By implementing these systematic care techniques, you’ll maximize the durability and effectiveness of your homemade sandbag.
Cost-Effective Alternatives and Modifications
When crafting DIY sandbags on a budget, resourcefulness becomes your greatest asset. Old backpacks transform into cost-effective outer bags for sandbags, especially when sourced from thrift stores or garage sales. You’ll minimize expenses by using free materials like construction site sand or landscaping gravel as fillers.
Enhance your home improvement project’s durability by modifying existing materials. Double up contractor garbage bags or use heavy-duty freezer bags as internal liners. Secure bag openings with zip ties or duct tape to prevent spillage and extend bag life. Repurpose household items like old clothes or rags for additional stuffing, maintaining bag weight and shape without extra spending.
These strategic modifications guarantee you create functional, affordable sandbags using readily available resources.
Frequently Asked Questions
How to Make a Homemade Sandbag?
You’ll need a sturdy backpack, contractor bags, and filling materials like gravel. Use sealing techniques with duct tape, carefully choose filling options, and secure your backpack with zip ties for a durable, effective homemade sandbag.
What Can I Use Instead of Sandbags?
Ever wondered about versatile flood protection? You can use reusable materials like old backpacks, tire pieces, or contractor bags filled with wood pellets, pea gravel, or dirt as practical, cost-effective weight alternatives for flood prevention.
What Is an Alternative Filling for Sandbags?
You’ll find eco-friendly fillings like wood stove pellets, recycled tire pieces, or landscaping gravel offer excellent alternative materials options. Dry beans, lead shot, and mixed fillers provide versatile, repurposed items for creating customized sandbag weights.
What Material Can I Use for Sandbags?
You can use recycled materials like wood stove pellets, pea gravel, or sand mixed with gravel for effective weight distribution. These versatile fillers are ideal for flood prevention and creating durable, cost-effective sandbags from readily available resources.
Conclusion
You’ve transformed your old backpack into a powerful fitness tool. Consider Sarah, a personal trainer who saved $200 by creating her own sandbags using contractor bags and wood pellets. By investing minimal time and resources, you’ll have a versatile training implement that challenges your strength and endurance. Remember to inspect your DIY sandbag regularly, replace worn materials, and adapt your techniques as you build muscle and resilience.